Hands-on tutorial
There are two parts to working with Friendly data. The files containing the metadata and datasets, and the set of conventions that need to be followed. We will start by understanding the conventions, so that working with the files later on will make sense.
There are two ways of working with the files: using the command line interface (CLI), and from a Python program using the Python API.
Table of Contents
Understanding the registry used by Friendly data
Currently only tabular datasets are supported, so we will limit our
discussion to tabular datasets like tables with one or more columns
(including time series). When working with tables it is common to
agree on a convention on how to identify rows uniquely. Typically
this is done by designating a column (or a set of columns) as the
index (or primary key). And like the index in a book, index entries
are required to be unique. We follow the same principle here, and
categorise a column either as an index column, or a regular (value)
column. Within the friendly_data framework we refer to them as
idxcols and cols respectively.

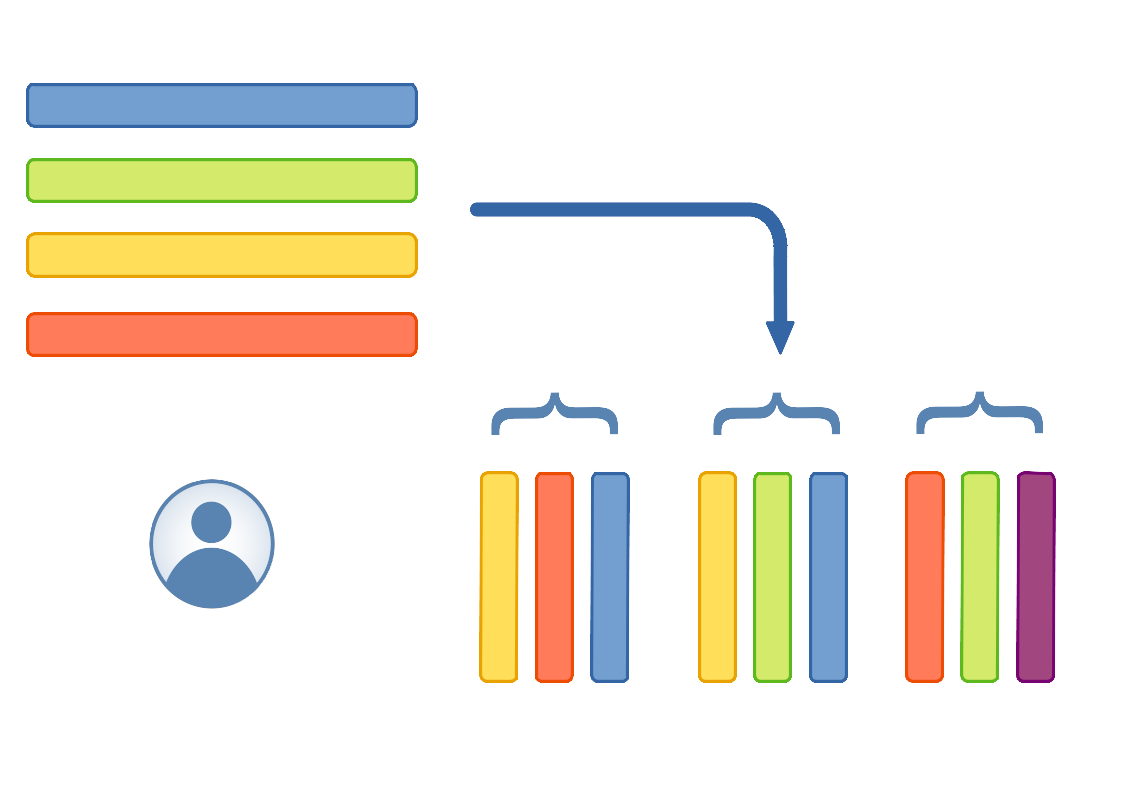
Schematic representation of a data package, composed of multiple datasets, where metadata for various columns are taken from the registry. Note: the last column in the last dataset is not present in the registry, denoting that it is possible to add columns not present in the registry.
While a table (dataset/data resource) in a data package can have any
number of columns, it is often helpful during analysis to designate an
index. Friendly data implements this by having an external registry
that records all columns that are generally useful in the context of
energy models, and categorising these columns. Some example columns
could be capacity_factor or energy storage capacity
(storage_capacity), or coordinates of a site or location, or
something much more generic like timestep indicating the timesteps
of a demand profile. Among the aforementioned columns, timestep
is the only index-column.

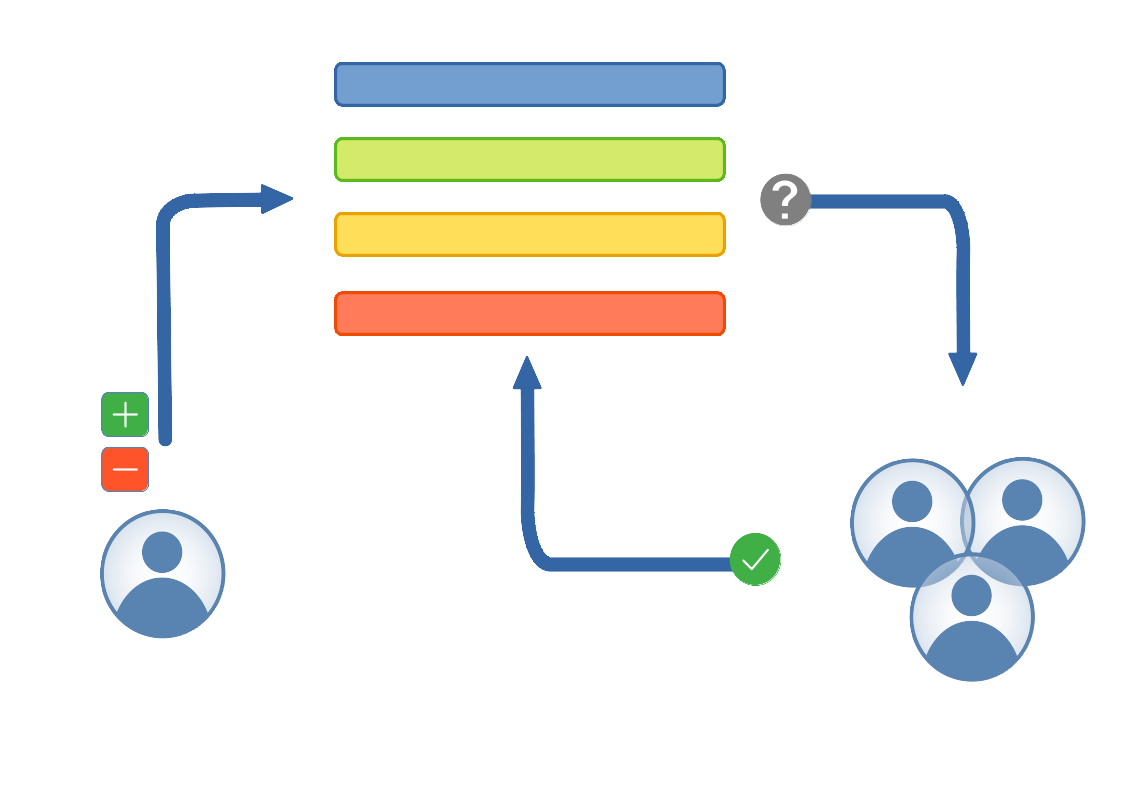
Updates to the registry undergoes a review process to gain consensus in the community. This should limit duplication of effort, and over time formalise the terminology.
In the beginning the registry will be evolving with time, and proposal for inclusion of new columns to suit your models, or renaming existing columns, or any other relavant changes are welcome. The goal is to reach a consensus on conventions that suit most energy modellers.
Besides naming and classifying columns, the registry also has type
information; e.g. timestep is of type datetime (timestamp with
date), GPS coordinates are pairs of coordinates, so it would be a
fractional number (number), technology on the other hand is
the name of a technology, so they are strings. The metadata can also
include constraints, e.g. capacity_factor is a number between
0 and 1, or technology can take one of a set of predefined
values. Now you might notice that, while everyone will agree with the
constraint on capacity_factor, the constraint on technology
will be different for different models. So this element is
configurable, and the Friendly data implementation infers the valid
set by sampling the dataset during package creation.
To review the current set of columns in the registry, please consult the complete registry documentation. Any changes or additions can be suggested by opening a Pull Request (PR) in the Friendly data registry repository on GitHub.
Column schema
The column schema can be specified either in YAML or JSON format. The
general structure is a Mapping (set of key-value pairs). Both forms are shown below.
JSON:
{
  "name": "energy_eff",
  "type": "number",
  "format": "default",
  "constraints": {
      "minimum": 0,
      "maximum": 1
  }
}
YAML:
name: energy_eff
type: number
format: default
constraints:
  minimum: 0
  maximum: 1
While only the name property is mandatory in the frictionless
specification, for SENTINEL archive we also expect the type
property. Constraints on the field can be specified by providing the
constraints key. It can take values like required,
maximum, minimum, enum, etc; see the frictionless
documentation for details.
Learning by example
Now that we understand the general design of the registry, lets take a look at an example dataset, and consider how we can use the registry to describe the schema. Say we have the following dataset:
technology |
timestep |
capacity_factor |
|---|---|---|
ccgt |
2005-01-05 17:00:00 |
1.0 |
ccgt |
2005-01-05 18:00:00 |
1.0 |
ccgt |
2005-01-05 19:00:00 |
0.985 |
ccgt |
2005-01-05 20:00:00 |
0.924 |
ccgt |
2005-01-05 21:00:00 |
0.841 |
ccgt |
2005-01-05 22:00:00 |
0.768 |
ccgt |
2005-01-05 23:00:00 |
0.761 |
free_transmission |
2005-01-01 05:00:00 |
0.0 |
free_transmission |
2005-01-01 06:00:00 |
0.0 |
free_transmission |
2005-01-01 07:00:00 |
0.110 |
free_transmission |
2005-01-01 08:00:00 |
1.0 |
free_transmission |
2005-01-01 09:00:00 |
1.0 |
Our value column, capacity factor, is a kind of efficiency:
So the corresponding entry in the registry would be:
{
  "name": "capacity_factor",
  "type": "number",
  "constraints": {
      "minimum": 0,
      "maximum": 1
  }
}
The first column, technology, should have an entry like this:
{
  "name": "technology",
  "type": "string",
  "constraints": {
      "enum": [
          "ccgt",
          "free-transmission"
      ]
  }
}
The enum property signifies that the column can only have values
present in this list. The timestep column looks like this:
{
  "name": "timesteps",
  "type": "datetime"
}
To describe our dataset, we need to mark the columns technology
and timestep as index-columns. So the final schema would look
like this:
{
  "fields": [
    {
      "name": "technology",
      "type": "string",
      "constraints": {
        "enum": [
            "ac_transmission",
            "ccgt",
        ]
      }
    },
    {
      "name": "timestep",
      "type": "datetime"
    },
    {
      "name": "capacity_factor",
      "type": "number",
      "constraints": {
        "minimum": 0,
        "maximum": 1
      }
    }
  ],
  "missingValues": [
    "null"
  ],
  "primaryKey": [
    "technology",
    "timestep"
  ]
}
where, the key primaryKey indicates the set of index columns.
Introducing the index file
Creating the metadata shown above can be tedious. So Friendly data simplifies the process by introducing an “index” file. In essence, much like the index of a book, it is the “index” of a data package. An index file lists datasets within the data package, and identifies columns in each dataset that are to be treated as the primary key (or index). Sometimes an index file entry may also contain other related info.
Let us examine how that might look using the capacity factor dataset as an example. The corresponding entry would look like this:
- path: capacity_factor.csv
  idxcols:
  - technology
  - timestep
It can be stored in the index.yaml file in the top level directory
of the package. An index also supports attaching other information
about a dataset, e.g. if you need to skip n lines from the top
when reading the corresponding file, you can simply add the key
skip: n. All datasets need not be included in the index, just
that if a dataset is not included, it does not gain from the
structured metadata already recorded in the Friendly data registry;
more details about the index file can be found at The Package Index file.
Metadata
One of the advantages of using a data package is to be able to attach detailed metadata to your datasets. The CLI interface makes this relatively straightforward. You can create a dataset by calling:
$ friendly_data create --name my-pkg --licenses CC0-1.0 \
      --keywords 'mymodel renewables energy' \
      path/to/pkgdir/index.yaml path/to/pkgdir/data/*.csv \
      --export my-data-pkg
Some of the options are mandatory, like --name and --licenses.
The command above will create a dataset with all the CSV files
that match the command line pattern, and all the files mentioned in
the index file. All datasets are copied to my-data-pkg, and
dataset schemas and metadata is written to
my-data-pkg/datapackage.json. If instead of --export,
--inplace (without arguments) is used, the datasets are left in
place, and the metadata is written to
path/to/pkgdir/datapackage.json.
A more convenient way to specify the metadata would be to use a configuration file, like this:
$ friendly_data create --metadata conf.yaml \
      pkgdir/index.yaml pkgdir/data/*.csv \
      --export my-data-pkg
The configuration file looks like this:
metadata:
  name: mypkg
  licenses: CC0-1.0
  keywords:
    - mymodel
    - renewables
    - energy
  description: |
    This is a test, let's see how this goes.
If there are multiple licenses, you can provide a list of licenses instead:
metadata:
  licenses: [CC0-1.0, Apache-2.0]
Updating existing packages
You can also modify existing data packages like this:
$ friendly_data update --licenses Apache-2.0 path/to/pkg
Here you can see the package is being relicensed under the Apache version 2.0 license. You could also add a new dataset like this:
$ friendly_data update path/to/pkg path/to/new_*.csv
You could also update the metadata of an existing dataset by updating
the index file before executing the command. You can find more
documentation about the CLI by using the --help flag.
$ friendly_data --help
$ friendly_data update --help